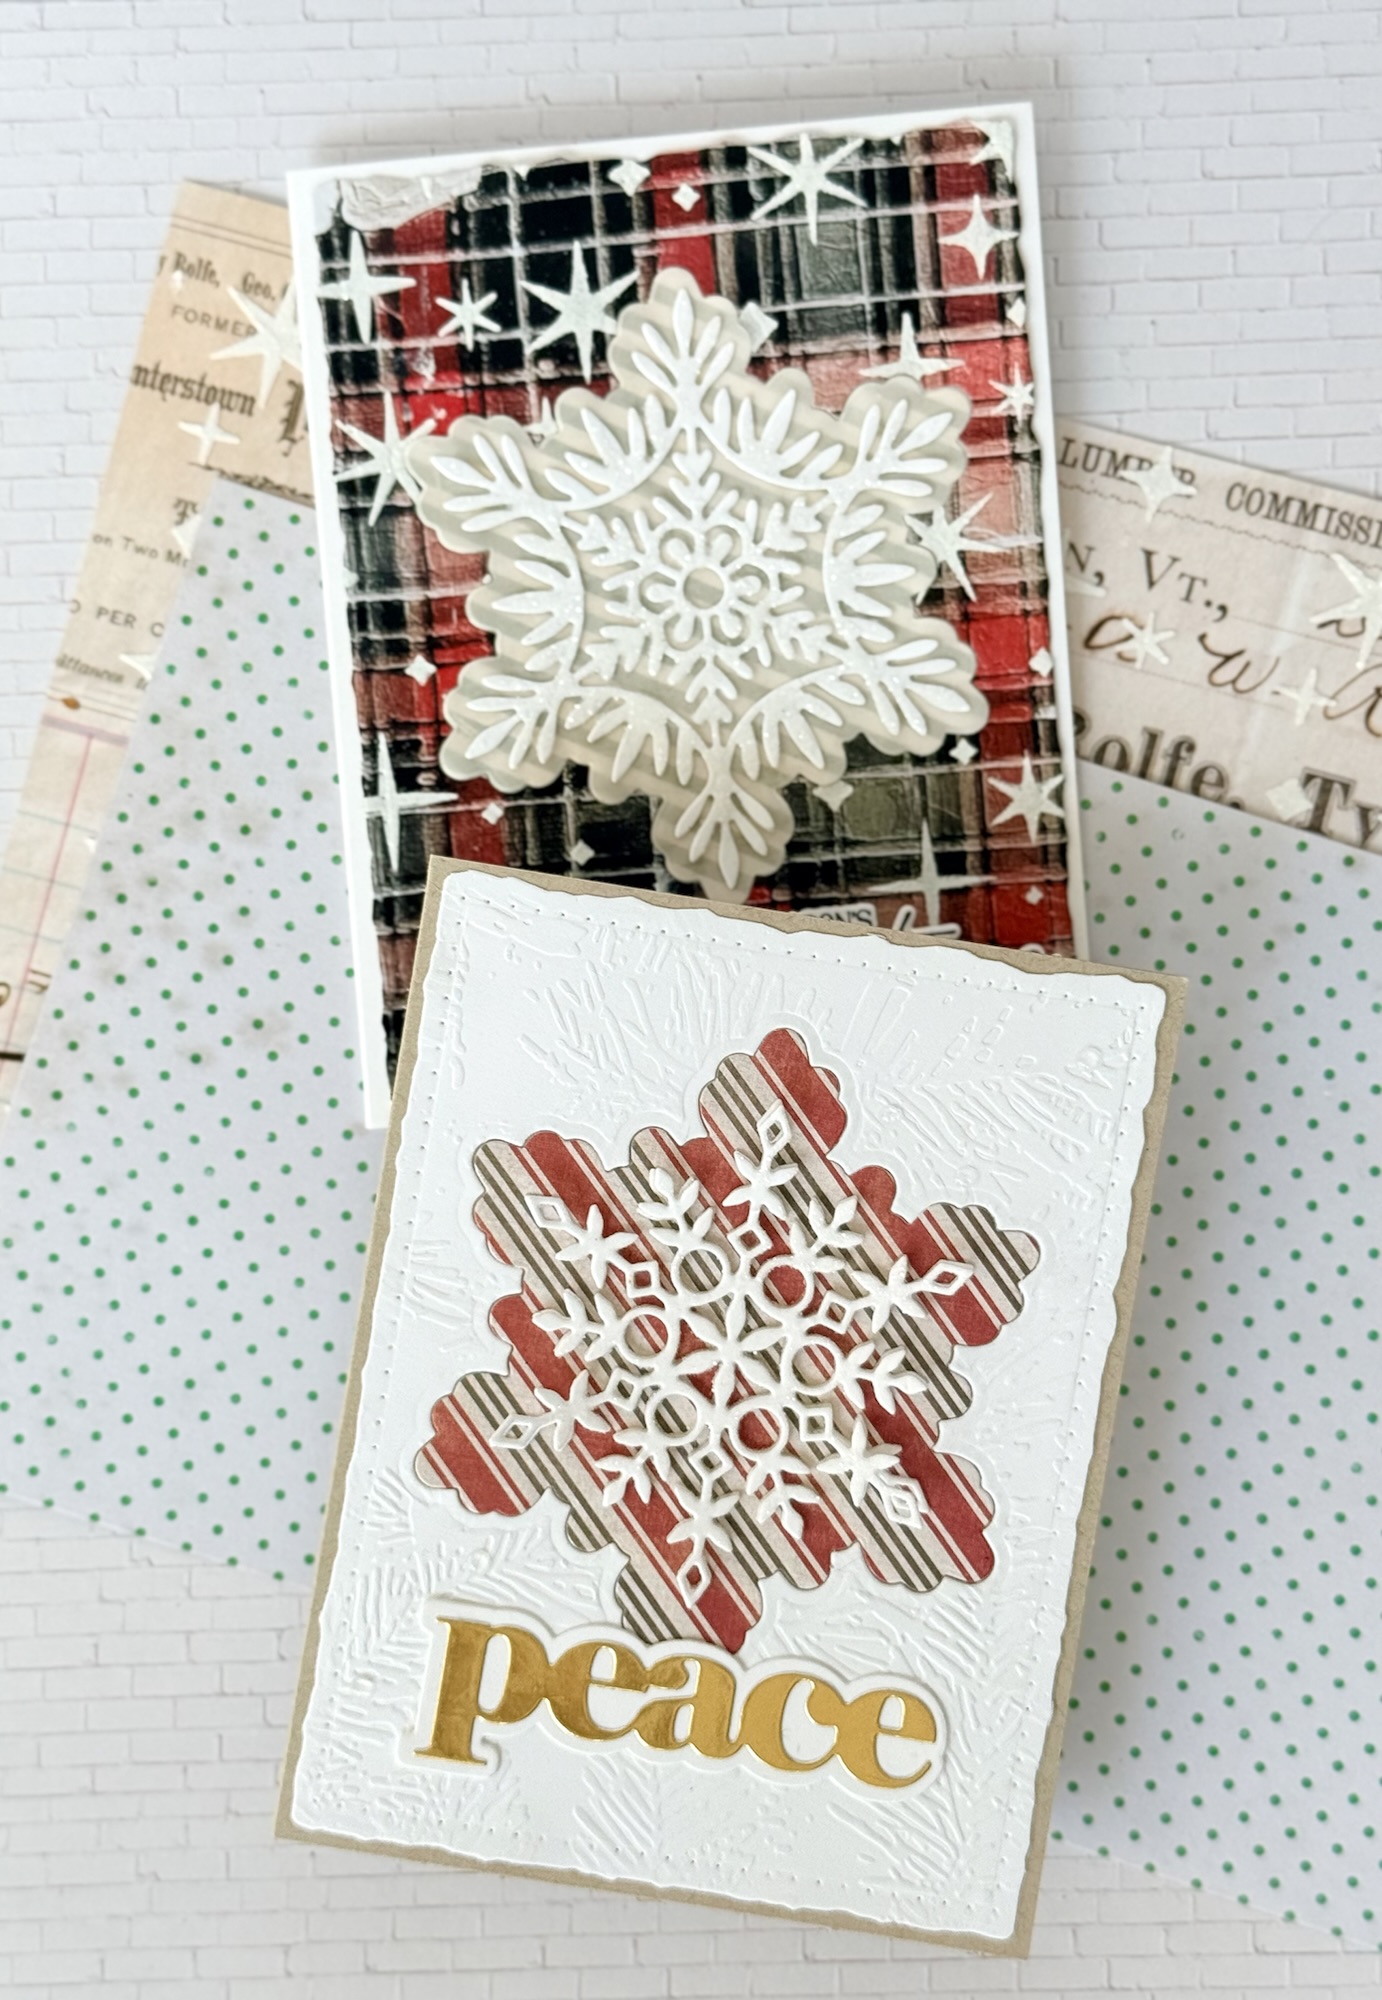
I love this snowflake design from Simon Says Stamp!
The Willow Snowflake set comes with a ‘large, graceful willowy snowflake die and its corresponding outline’, making it a two-piece, snowflake statement, perfect for an A2 card. I paired it here with color palettes that include white, red, smoky blue-grey, black, gold and glitter.
In the first card I embellished the intricate Willow snowflake die with Distress Rock Candy Crystal Clear Glitter. To do this I applied Ranger’s Glossy Accents, a clear, wet, tacky medium, by squeezing the fine tipped applicator and quickly tracing the snowflake image. Then I added Rock Candy glitter, shaking off the excess and allowing to completely dry before layering.

I cut the background with a frame from Pinkfresh’s Dotted Nested Deckled Rectangles die set. I also positioned the Willow outline die over the background and cut it out to leave an inset space for layering. I next cut two more Willow snowflake outline dies: one from clear vellum, the other from a complementary patterned card stock.
Once the glitter was dry, I layered the snowflake as the focal by centering and gluing over the two outline die cuts. To glue the snowflake to the vellum to the cardstock, I used Tombow Multi Mono liquid glue. It tends to dry clear but you still need to apply the glue carefully behind the intricate details on both the snowflake and the vellum layer. Always use glue sparingly until you know how much glue is just enough!
A Versamark Onyx stamped and die cut greeting was positioned in the lower right corner. This sentiment is from Pinkfresh Studios Seasonal Sprigs set which you can find more about here. Once the card front was complete I attached it to a white A2 card base.
Tip: Give Rocky Candy plenty of time to dry on your project piece or area before handling and assembling, or pre-make.

With this card I did start with a pre-made background. The starry, plaid vintage look was made during an earlier crafting session when I didn’t want to design or assemble, just do something simple like stencil backgrounds onto patterned card stock and add glitter.
With a palette knife and the Twinkle stencil from the Tim Holtz Collection I added Altenew’s white opaque embossing paste across the patterned sheet. Over the wet medium I poured on a generous layer of Distress Rock Candy glitter, then gently tapped off excess onto a clean sheet of paper to funnel back into the jar for reuse. I did this process onto several different background sheets from Tim Holtz’s Backdrops- Christmas Noel because I loved the look!
Having an embellished background pre-made to cut and layer made less work when assembling. To produce more of this card style I will have ready-to-go glittered snowflakes and backgrounds on hand, as well as stamped and die cut sentiments. The same applies to the next card design.
Tip: Have a set of glittered snowflakes and stenciled background patterns pre-made and ready for easy assembly.

For the focal image in this card I use two Eliza Snowflakes from Simon Says Stamp with Rock Candy glitter already applied and dry.
To assemble:
- Die cut white card stock with the largest Dotted Nested Deckled Rectangles frame to fit A2 card base
- Emboss this with conifer needle patterned 2D embossing folder or other seasonal pattern
- Use Willow outline die to cut an inset space on white card panel. Position accordingly for sentiment placement.
- Use vintage, holiday patterned card stock to die cut the Willow outline image again, set aside.
- Next, affix the white, embossed card panel onto a Neenah, Desert Storm, 100lb, folded A2 card base. This is glued into place before adding the snowflake focal.
Instead of using the coordinating Willow snowflake I decided to use two glittery Eliza snowflakes layered on top of one another. These were pre-made, handy and seemed to still pair well with the Willow outline. The smaller, dainty design also reveals more color from the patterned paper.
To assemble snowflake focal image:
- Glue one pre-made Eliza snowflake flat onto the Willow outline patterned inset piece. Use Tombow glue again here. Hold in place to dry.
- Next, attach second snowflake, glued only at the center of design, onto the first snowflake. Hold in place to dry. This allows movement at the edges of your top snowflake and final design looks best done with two stacked.
- Glue and insert into place the die cut vintage, holiday patterned card stock, with Eliza snowflakes attached. Hold into place.
- Finally, attach sentiment to card.

Both cards are low profile having only used paper as layers, with no dimensional foam. The sparkle from Rock Candy acts as embellishment and complements the intricate snowflake patterns. By using pre-made elements these two snowflake-centered card designs came together easily.
To see more snowflake- centered cards, look here.
For cards featuring more Christmas Noel Backdrops, visit here.


Leave a Reply