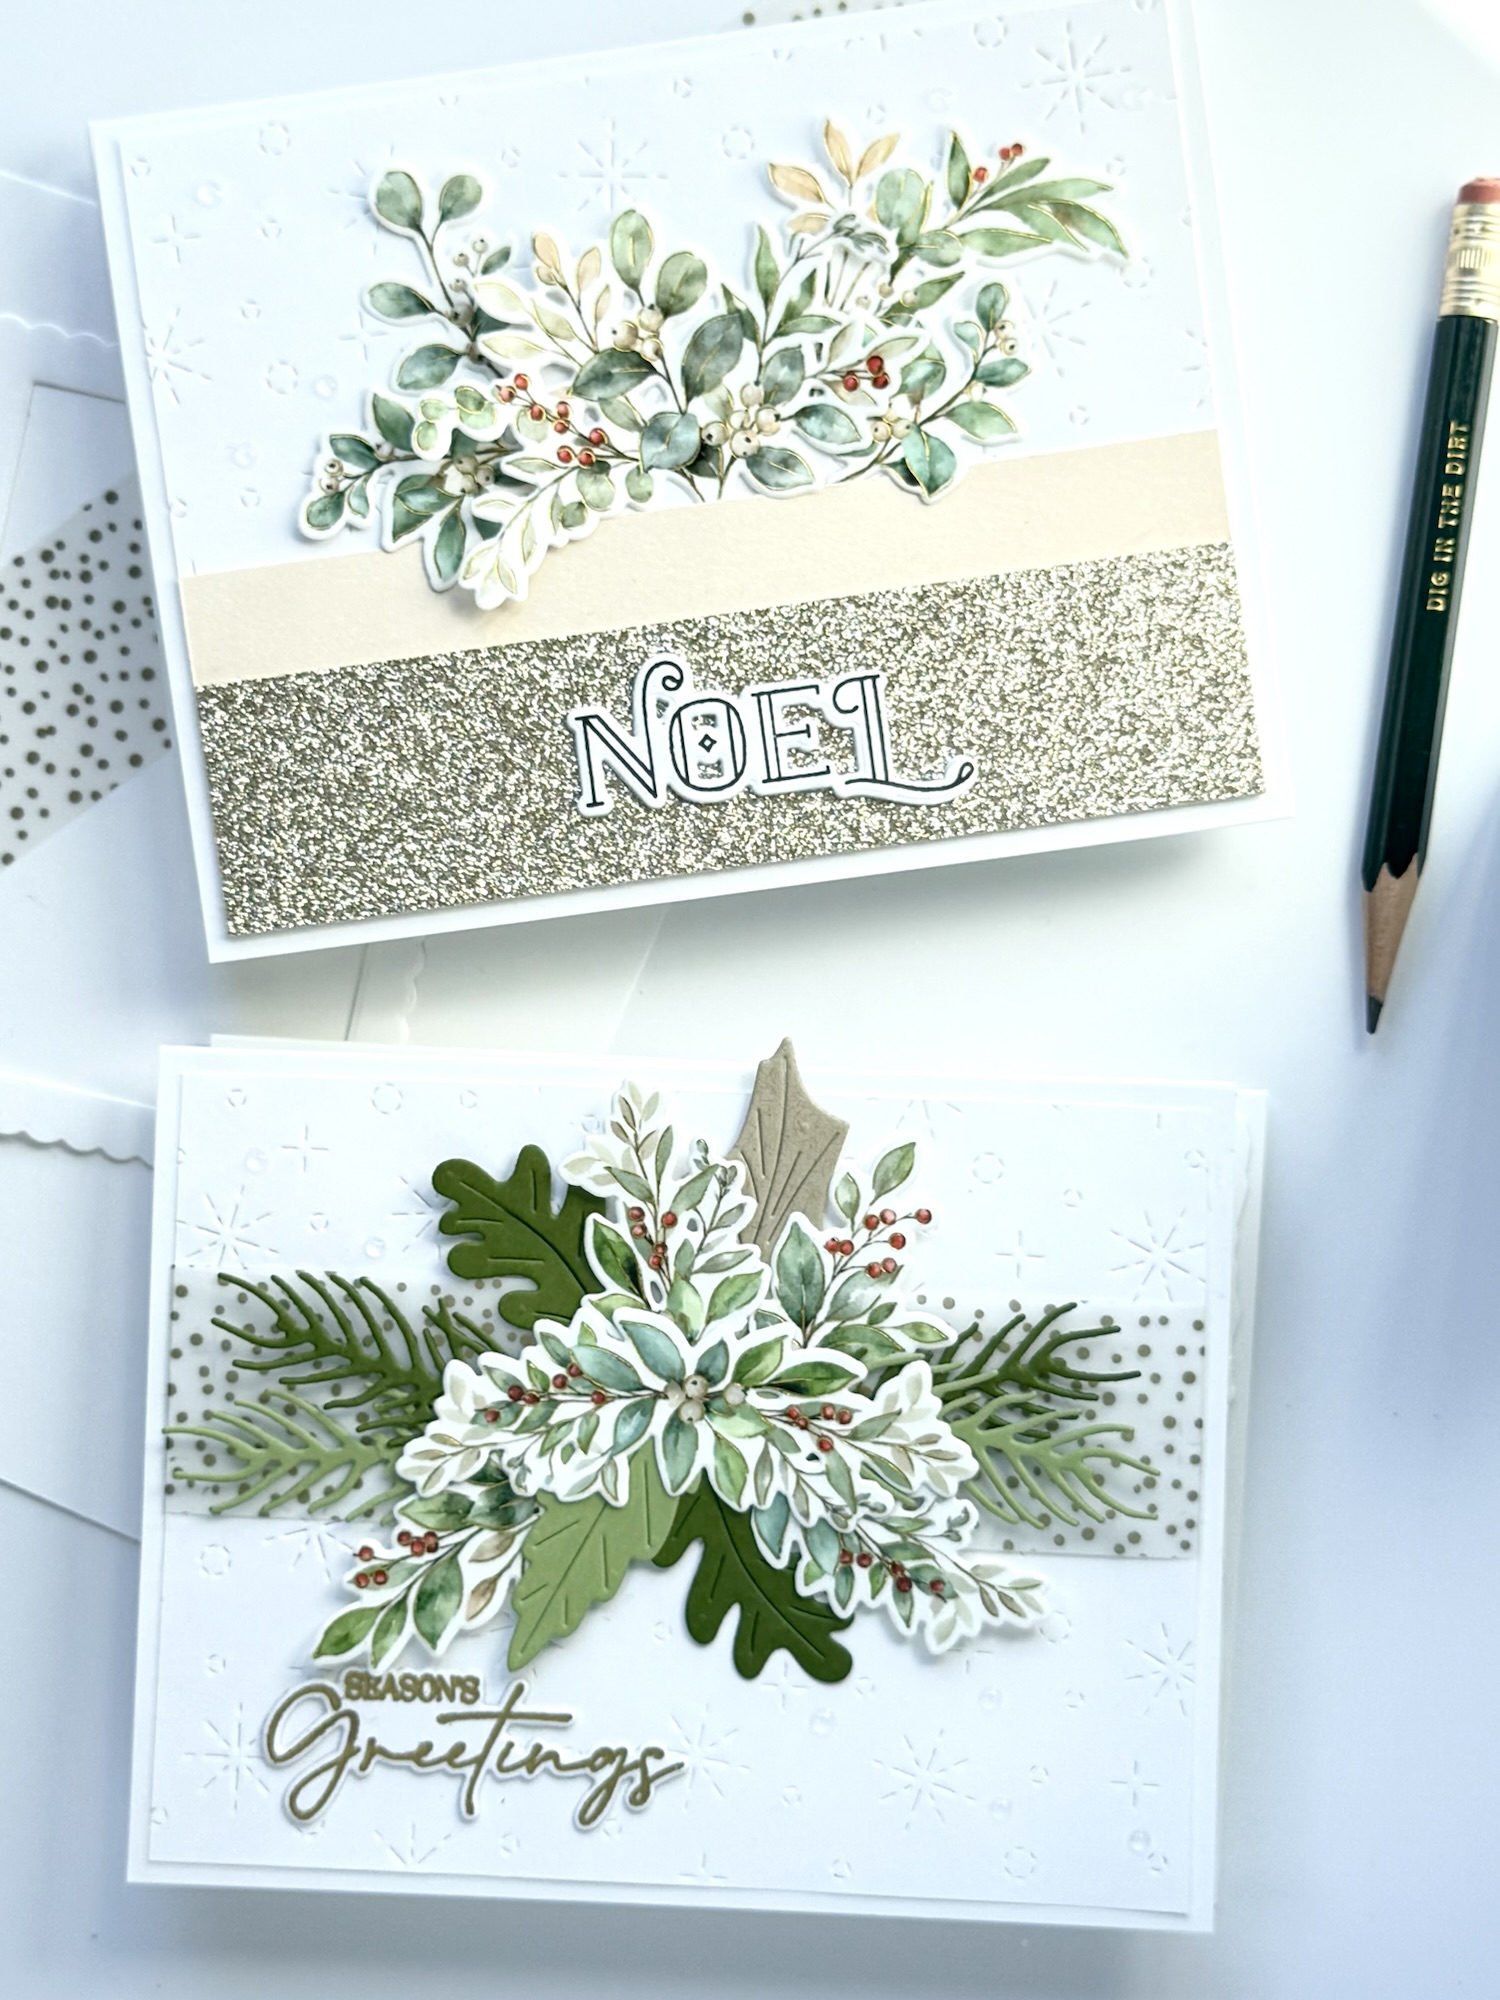
Moving on from collage cards, I decided to return to a card style that I tend to gravitate because of its clean look, simple layering and lots of white space.
The main focal points of these cards use a wreath and/ or holiday greenery from Pinkfresh Studio’s product suite called Seasonal Sprigs. There are probably quite a few holiday wreath stamp and die sets on the paper crafting market but I liked this one because of the wreath size, design, color possibilities and the set’s holiday sentiments and coordinating dies.
I began with stamping the wreath and adjoining greenery in a light neutral tone ink then stenciled on a fall color palette using dye inks from Concord & 9th (C9) including Avocado, Pistachio, Nectar and Cayenne. I also stenciled a layer (#5 of the six stencil set) Simon Says Stamp Sparkle Paste in gold. Then I die cut the images using the coordinating plate. I embossed a white cardstock background with a conifer themed embossing folder to add to the winter feel, then layered.

For the front panel I die cut white cardstock with Dotted Nested Deckled Rectangles, also from Pinkfresh. In between I added a thin frame of gold glitter card stock to echo the Antique Gold heat embossed sentiment, ‘May your home be filled with joy.’ This card was inspired by Pinkfresh’s blog post, Two Festive Cards with the Seasonal Sprigs Suite from September 2026.

Pinkfresh Studios have been making these product suites for many years but this was my first time purchasing. I watched a video of Carissa Wiley showcasing ‘tips and tricks’ on how to use them on her you Tube channel from five years ago and this inspired me to try using the washi tape to create lots of greenery to use on a large set of holiday cards.
I had never used washi tape with die cutting, and didn’t know it was a thing, but this would help me mass produce cards and save time. Though I enjoy stenciling and playing with color, the Seasonal Sprigs washi tape has its own beautiful color palette with gold foil accents that I couldn’t pass up. Most of the cards that follow use the washi tape images.

Continuing to use the Dotted Nested Deckled Rectangles as frames, I made a set of four wreath focal cards, two with C9 Almond cardstock external frames, and two with the die cut centers as a background layer. To complete the cards, I heat embossed sentiments from the same set using Antique Gold embossing powder from Altenew, layered them behind a double cut background to give them a little dimension, then glued into place.
Tip: To make the external cardstock frame, use two of the dies from the rectangle set arranged on your card stock and die cut together. I find this easiest to do with a magnetic cutting plate like what you’d find with the Empress Elite die cutting machine, or you can use repositionable tape to anchor the dies so they don’t shift while handling or cutting.

For these simple card backgrounds I use both a steel coverplate die and a plastic 2D embossing folder, each with a snowflake theme, on white card stock. This becomes a consistent theme throughout the card set and helps unify them even with their different designs.
What you will discover with the washi tape and dies is that they have to be used as a grouped set of images. The dies are divided into two large multi-die connected plates that cut several images out at once. You can’t just use the wreath image alone from the washi tape or die cut only a wreath image.
This has pluses and minuses.

The former could be viewed as a minus. If you’re in it just for the wreath, you’re going to be producing a lot of other surplus images. It is a gorgeous wreath design afterall.
On the plus side, it’s overall easy to use as the dies fit perfectly with the washi tape images and cutting them is simple. There is less work for you lining up one die image vs. six. And you get the gorgeous pre-colored images! The set is designed to do so much more and efficiently.
What you don’t get is pre-printed, gold shimmer sentiments as part of the washi tape roll. The rolls do have 40- 43 full design sequence panels. With nine total images in a panel that’s over 350 individual pieces to design and create. That’s a lot of cards!

My next set of cards were designed with the purpose of using up the other images in the set which include a swag, a bouquet and at least six more branches of greenery, some of which are very small. I once again use an embossed, white-space background for each.
I also incorporated the Champagne Glitter card stock from C9’s Mistletoe assorted holiday card stock set (currently available). I love the Champagne Glitter! Here it’s paired with a strip of Almond, which is a new color released this year as part of C9’s Neutrals Collection color refresh. Bouquets are made by layering the floral die cuts and then gluing behind the colorful foreground layers. Love how the glitter cardstock is showing off just enough.

The ‘Noel’ sentiment was selected from Simon Says Stamp’s (SSS) previous holiday release Making Spirits Bright Stamp and Die Set. That set has some great sentiments and this Onyx stamped ‘Noel’ on white cardstock is just one of three styles of fonts in that set, two of which have coordinating dies. This font with a slight Scandinavian flair fits perfectly with this card design.
Another short-lettered holiday sentiment, cut in gold foil paper, on a white die outline, is off-set at the bottom right of the next card design. ‘Joy’, from C9’s Holiday Sayings Die Set, is a clean, slightly chunky serif font. The Seasonal Sprigs image used is a holiday swag attached to the rim of an embossed, die cut and stamped image from Papertrey Ink’s Vase Collection 1. Other color card stock die cut greenery has been added to create a mixed bouquet emerging from the vase. The color palette includes Neenah, Desert Storm and C9’s Pistachio and Artichoke.

In the next card I create another lavish bouquet using multiple Seasonal Sprigs floral die cuts and colored card stock dies. I keep with the same overall color palette led by the colors in the washi tape while also using C9 greens, gold and neutrals. This card also has a background strip of printed Recollection’s gold dot vellum. A heat embossed ‘Season’s Greeting’ looks handsome off-set at the bottom of the image allowing much of the white embossed background to show through.
I found that using this product suite (all four parts totaling under $100) is worth this value to create so many lovely and unique cards. I made a unified 12-card holiday set here, each with a unique focal, all maximizing on subtle, clean, white embossed backgrounds. Add in the stamping and stenciling and you unlock so many more color palettes, themes and designs.

The smallest washi image fits in nicely with this hand made, multi-die cut wreath. This design was used previously in my Tim Holtz collage Christmas card session (find it here). Using two simple circle dies from Spellbinders, I layer the two within each other to get a circle outline about 1/8th of an inch thick. On this background piece I angled and arranged then glued each individual die cut piece. Making this style wreath is extra special because it takes a bit of time. It’s a beautiful, stand out piece in this card set.

The background remains consistent and simple, so does the sentiment. ‘Very Merry’ is also from C9’s Holiday Sayings Die Set. Gold foil lettering is stacked on a white outline.
In the next card this sentiment is used with another washi tape wreath. This time I created my own frame design by layering dies from two different frame sets: SSS’s A2 Scalloped Rectangles and My Favorite Things Die-namics Stitched Rectangles.
To add depth to the white background I added a white die cut floral image behind a piece of vellum behind the double cut frame. This die is Leafy Branch by SSS. It’s subtle enough but adds long, vertical interest to the background and matches the leaf shape in the wreath.

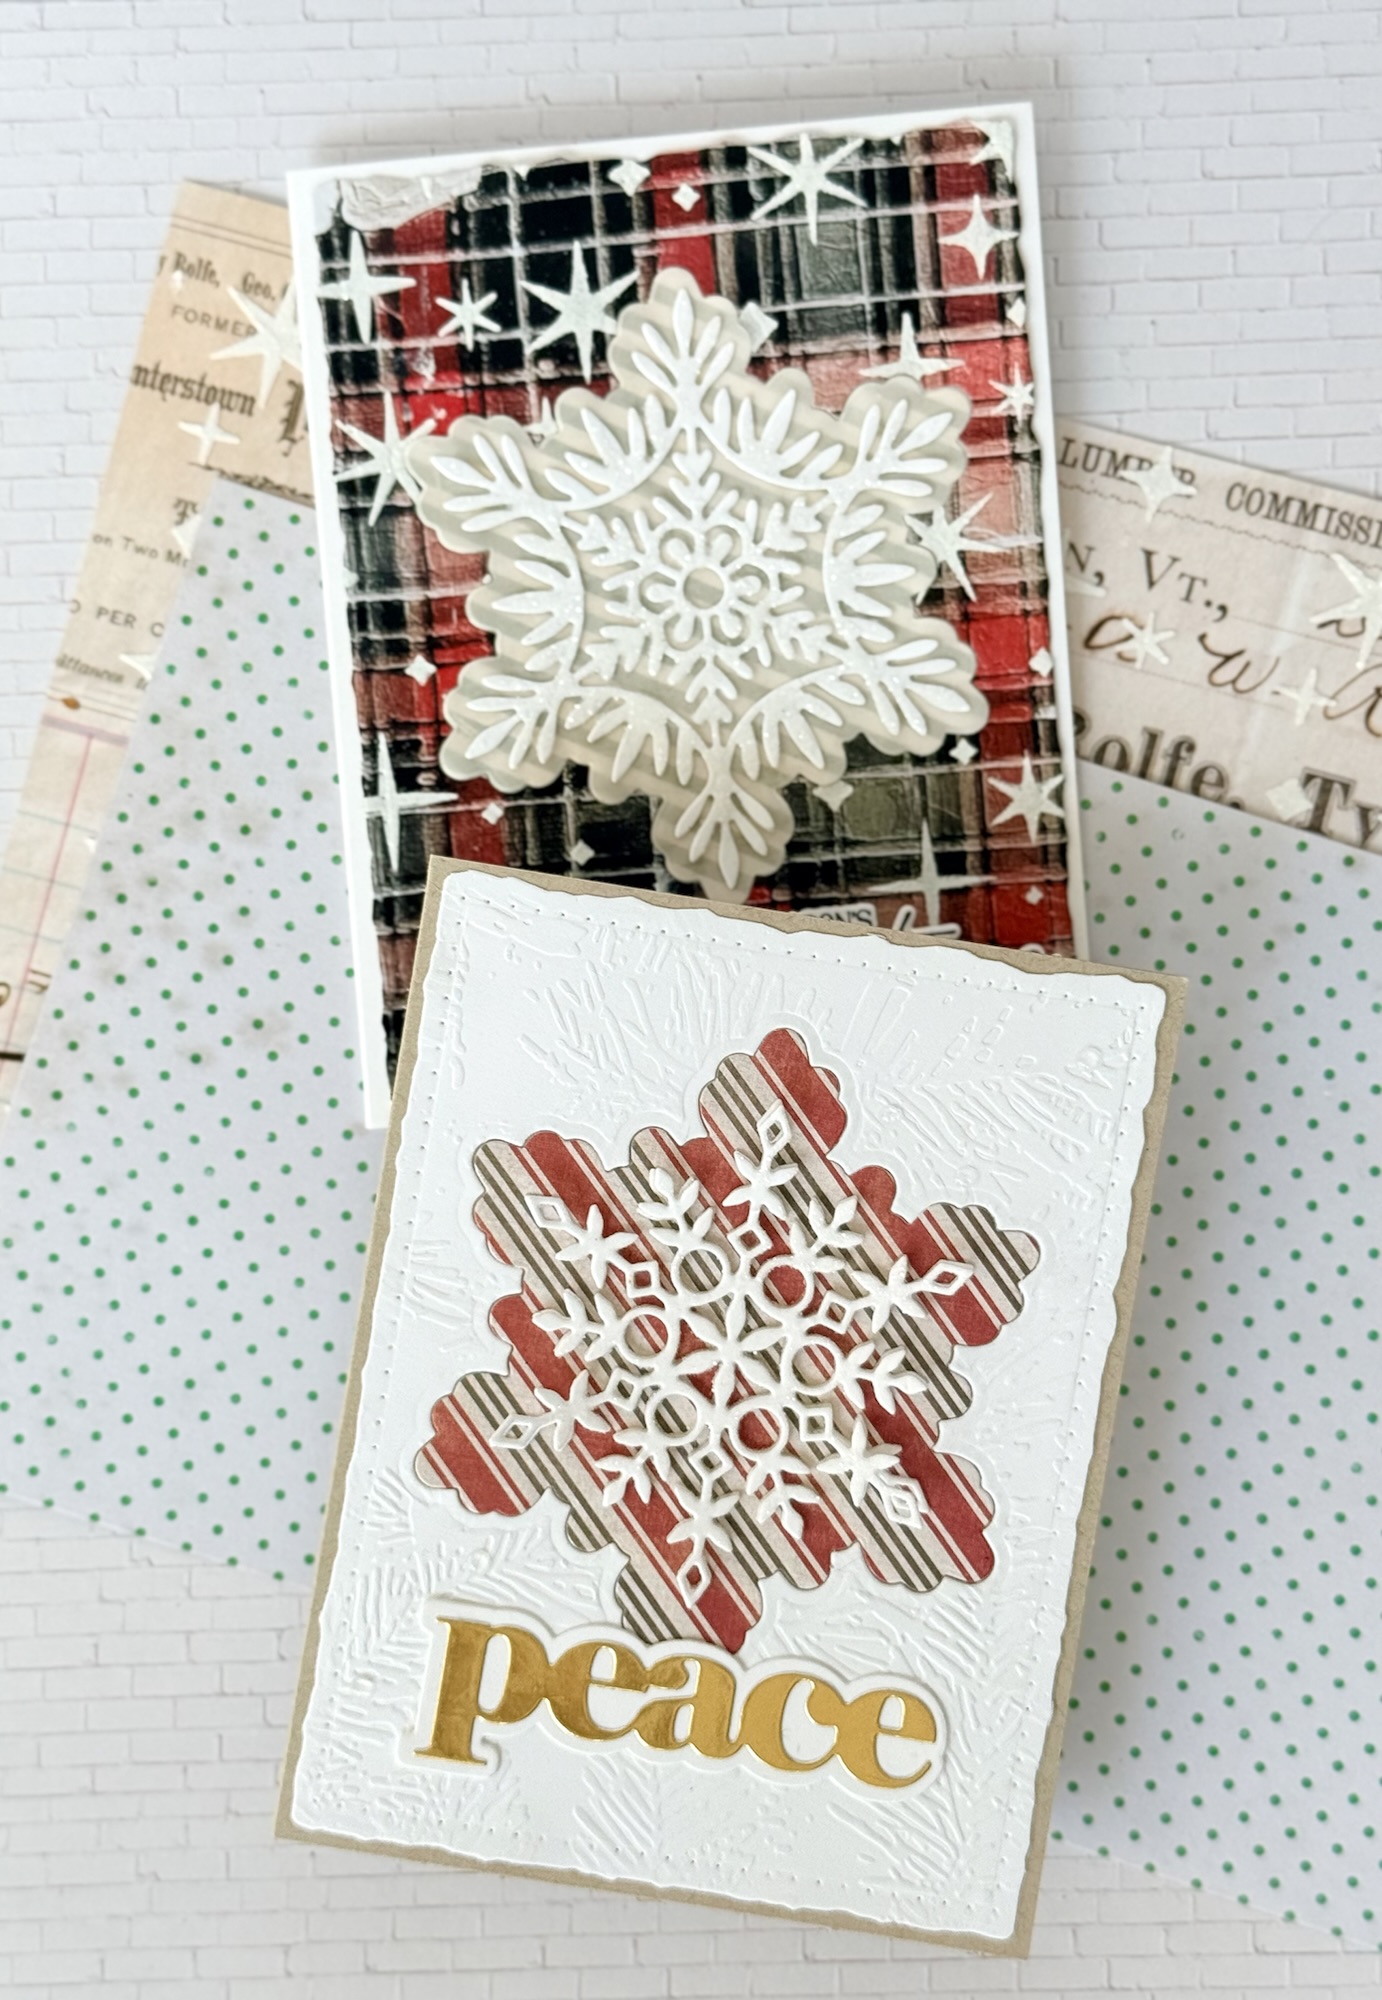
In the next card I change up my focal. I depart from using the Seasonal Sprig’s greenery and instead use the two piece Willow Snowflake die set from Simon Says Stamp. I also wanted to incorporate more colors from the Mistletoe Color Collection. To do this I use a multi-color diagonal block design made from C9’s card stock that I cut with a diagonal stitched frame. Then I add an extra layer of glitter card stock to frame that main image.
Tip: Rather than use an entire piece of glitter cardstock behind your forward layers, cut out a center piece of the glitter card stock, then cut the same piece in scrap card stock to use as an insert in this space behind the main image. Glue this into place inside the outer glitter edge, then glue main image centered over it. I layer this glitter frame on top of a white diagonal stitch frame echoing the inside color block die cut frame.

I had considered using a glitter die cut center snowflake piece but after cutting it out and working to get the intricate and fragile paper pieces out of the die and then ripping it (later being mended during a paper surgery), I decided it was too much glitter. Too many glitter pieces or accents can be too much in some projects, so I opted for a natural Neenah, Desert Storm snowflake look. Goes to show that not every snowflake needs to sparkle or shine.
Another plus of Seasonal Sprigs is its sentiments, three of which feature mixed-styled fonts and coordinating dies. Most of mine used here were heat embossed with Altenew’s Antique Gold which pairs perfectly with the gold foil highlights in the printed washi tape.

Overall, I made good use of this set, demonstrating how every floral element can find a place and nothing goes to waste. By combining several layering and background techniques, I created a dynamic collection of holiday cards with plenty of variety.
Which are your favorites? What possibilities do you see?
Find the Pinkfresh blog post here.
Check out more cards using Papertrey Ink Vase Collections here and here.

Leave a Reply