
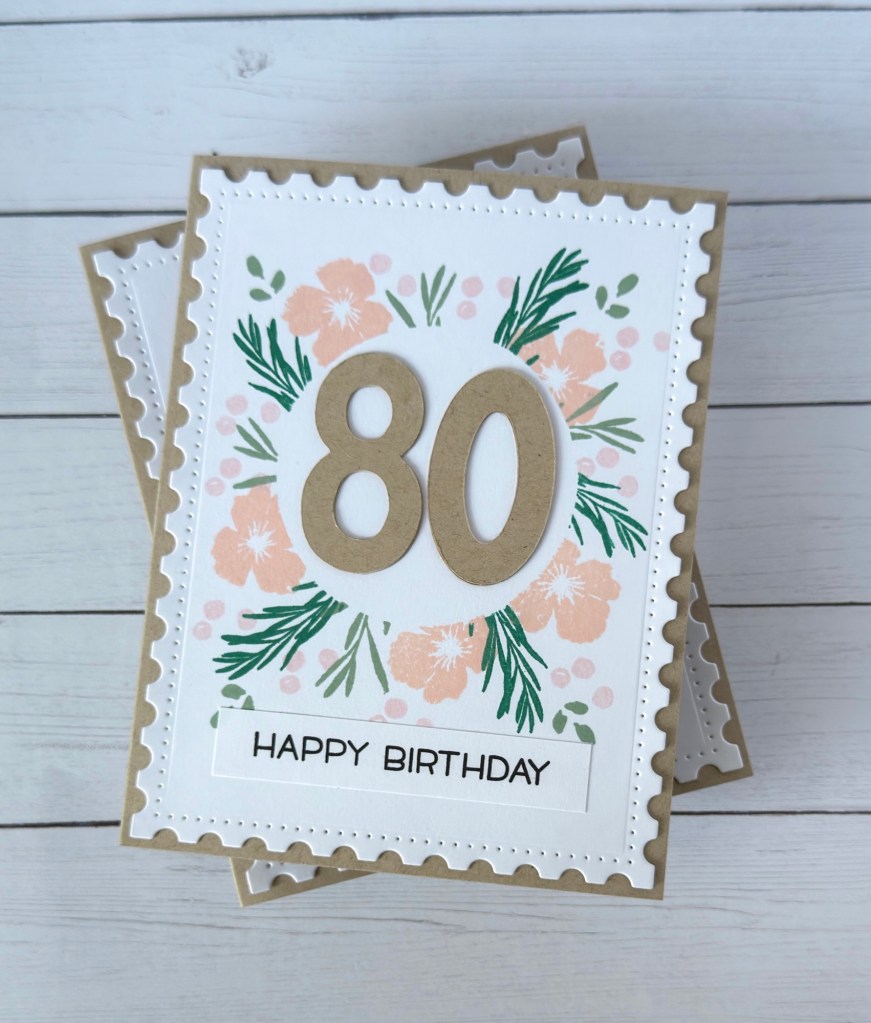
Looking to celebrate my mother’s 80th birthday, I thought I’d make a card with a large ’80’ at the center to acknowledge this special milestone. With a little Pinterest searching I came across a design with a large ’90’ cut in kraft paper with a colorful stamped wreath around it.
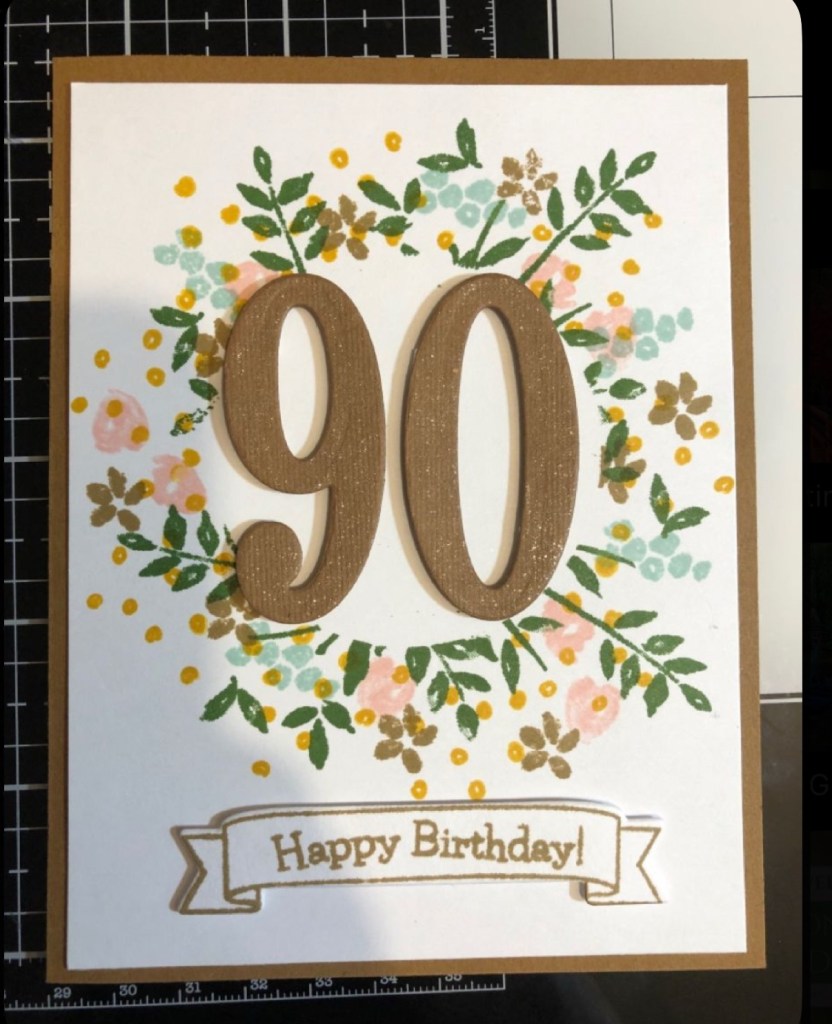
According to the pin this was made using Stampin’ Up products which I don’t own but part of the fun of making cards is to rifle through all your stuff to find what products you do have that’ll get you closest to your inspiration design.

First I found foliage stamps that would work for the card background. I used several different stamp sets to get this botanical flare look with added subtle embellishments like a clutter of dots. The sets I used include: Blooms Fill-In Stamp and Dies Set from Concord & 9th, Garden Delight from Inkadinkado and Sprigs and Sprays Stamp and Die Set from Papertrey Ink.
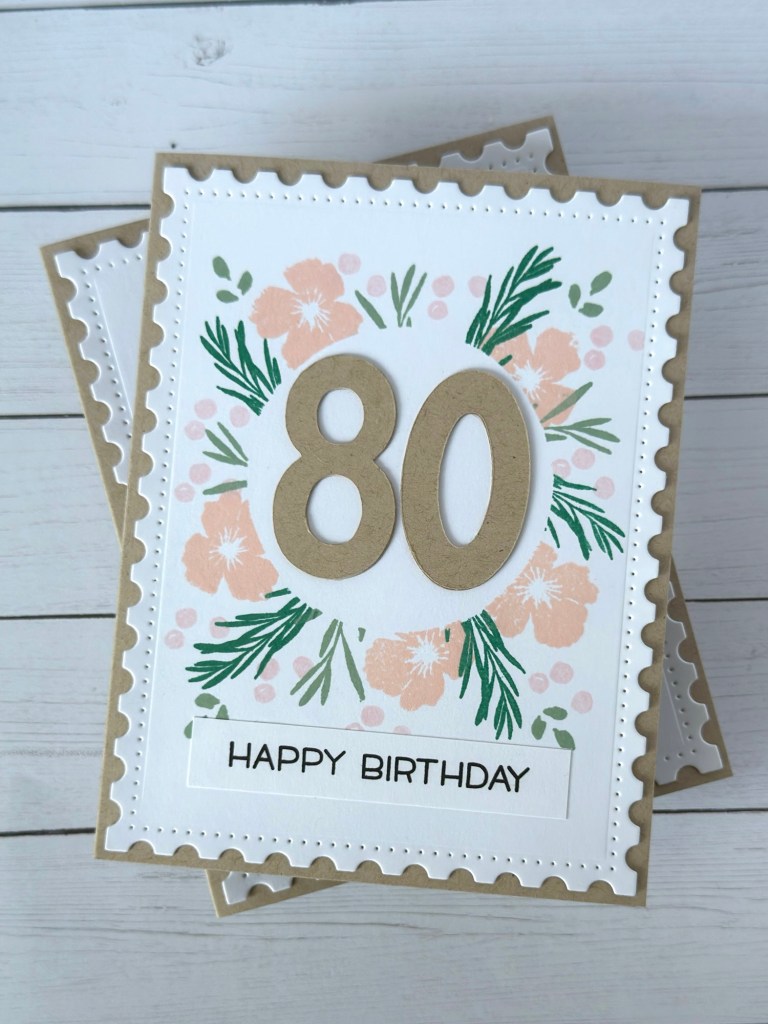
Next I decided on the size of the space for the birthday number that I wanted to use for my standard A2 card so that I could cut a mask and center my stamping appropriately. Using Gink K Designs Masking Magic paper, I cut a circle (2 3/8 inches in diameter) to fit the number size that I wanted using Nestabilities Standard Circles Large Die Set from Spellbinders. I thought that this proportion would fit my postage stamp frame and overall design. This will mask the center of the card where the number will go so that I can stamp around it.
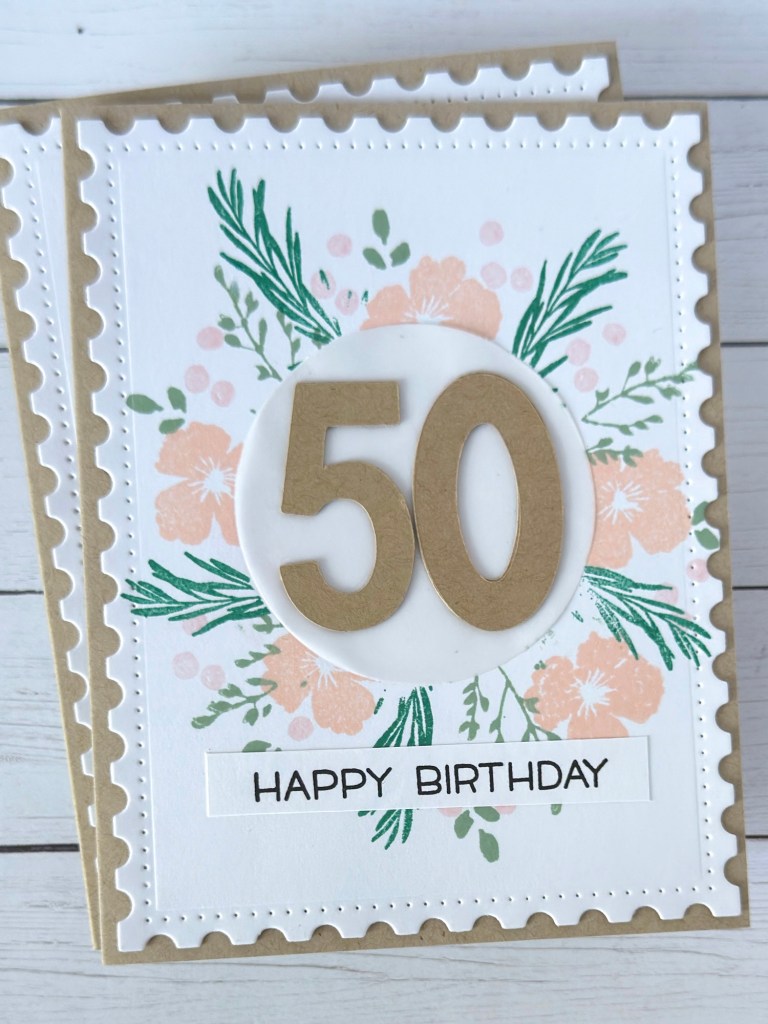
I do not have a set of large number dies that may have been used to make the inspiration card but what I do have is a Cricut Explore Air 2 Die Cutting Machine which really comes in handy for my card making when I’m needing basic shapes, particular images or chunky sentiments that I don’t own as steel cut dies.
I usually have to do a little searching in Cricut Design Space, Cricut’s online software program, to find the right image for my purposes, but once found it’s a simple matter of sizing the image on their design canvas for my card and sending it to the machine to cut. I purchased these numbers for .99 each and can now use them as often as I like.

Next I selected the color palette for my botanicals. For this I referred to my collection of stamped swatches. I knew that I wanted greens and pinks and decided upon C9’s Ballet Slipper, Juniper, Nectar and Catherine Pooler’s Sage. Starting with a 5 1/2 x 4 1/2 ” base I centered my circular mask where I wanted to stamp around and began stamping with my greens and then pinks. I used a stamping block and did some free hand stamping for this.
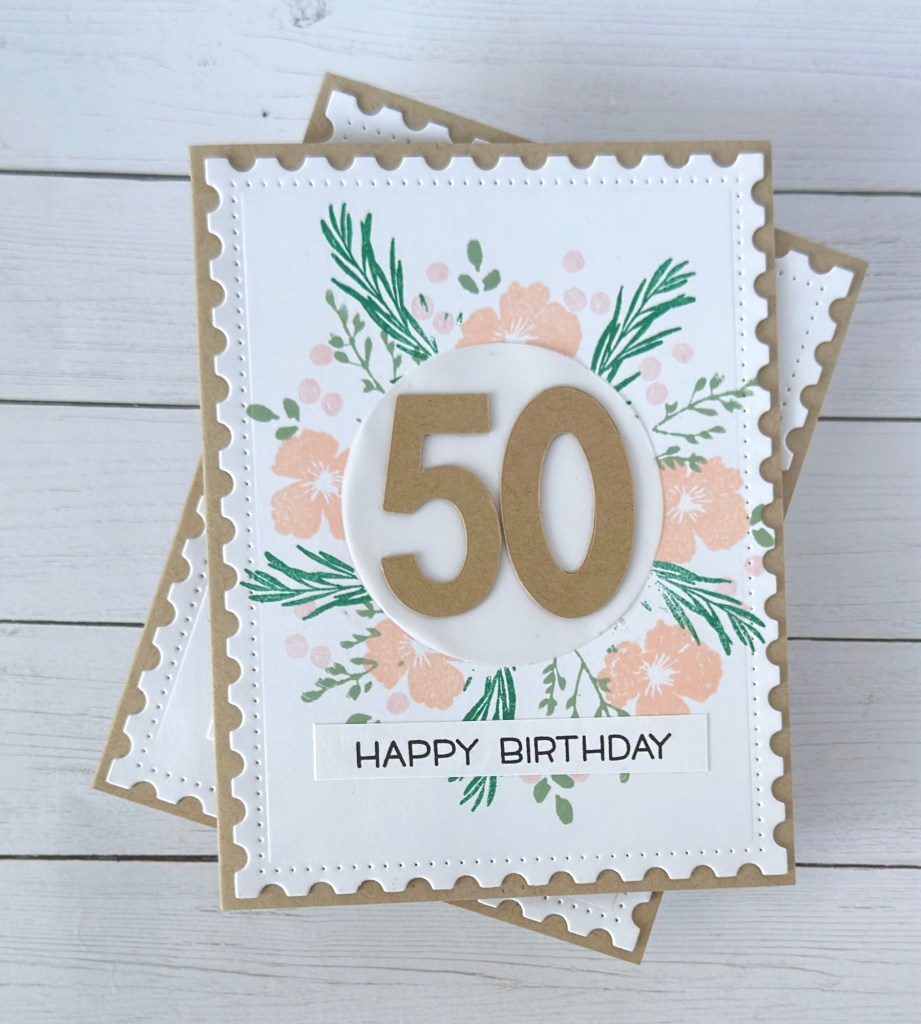
What I learned from my first draft of stamping was that I wanted to move the circle mask up a littIe more to account for a sentiment strip at the bottom. I also changed up my foliage selection a bit and then stamped again. Next I cut the frame edge with Nested Rectangles Postage Edge from Pinkfresh Studio. I centered the large numbers, glued and added the ‘Happy Birthday’ sentiment strip. This one is from Happy, Happy, Happy, a great set by Lawn Fawn.
Overall I think my replication was a success and I am now looking for other layouts to try with various sizes of large die cut birthday milestones.
Do you make cards featuring birthday milestones? If so, how do you style your numbers?


Leave a comment